 Tweet
Tweet
http://www.youtube.com/watch?v=3pfQJ70A15k
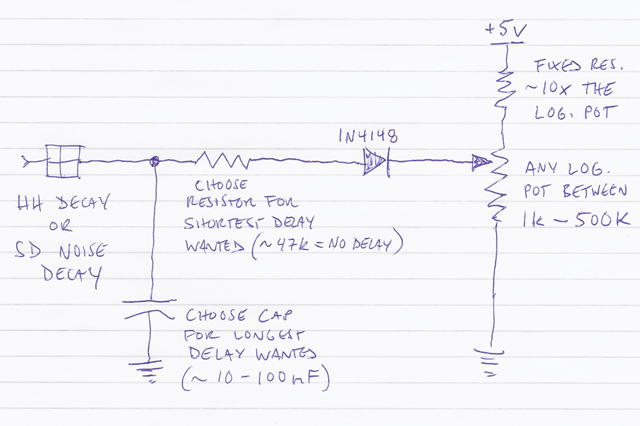
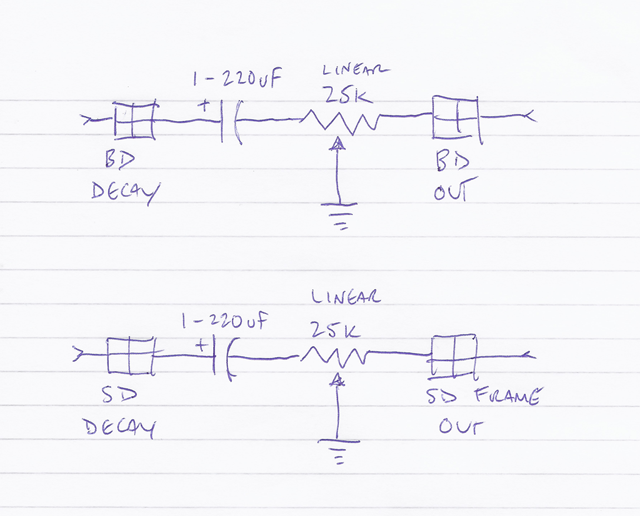
I spent a day this week exploring the Korg monotribe..
I'll detail all the mods when i get some time, but i did discover some of the info on the web so far re: modding the monotribe is WRONG,
and this info has been copy/pasted all over the place.. SO, if you have had brain damage attempting to mod Yours, relax, i'll sort you out..


 so, while im thinking about doing a more serious MIDI IN, some of this has to be applied.
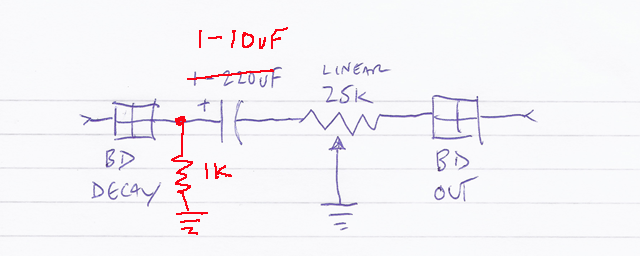
Comment